fMRI data preprocessing
Smoothing
Smoothing is the process of averaging the signal in each voxel with a weighted average of the signal of neighbouring voxels.
Why smooth my data?
Smoothing is a common step performed as part of fMRI data preprocessing. Although it might seem counter-intuitive since it decreases the spatial resolution of the data, it has several benefits. Smoothing increases the signal-to-noise ratio (i.e. enhances the signal), compensates for minor differences in neuroanatomy across individuals, and can further help with normalisation by improving the mapping of small structures to the template space.
For a thorough overview of issues related to smoothing, see the SPM book:
-
From the SPM menu panel, select
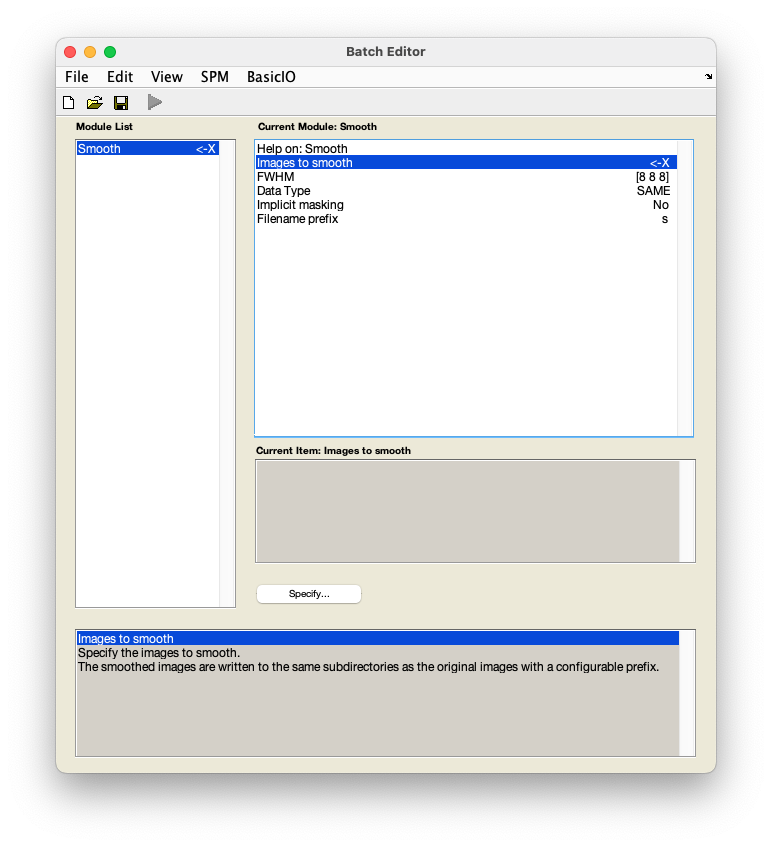
Smooth. You will see a pop-up window appear looking like this:
-
Select
Images to smooth. - In the pop-up window, navigate to
sub-01/func/. - Use the box underneath the
Filterbutton to show a 4D file by typing inNaNand pressing Enter. You can do this in combination with filtering for files starting withwarby typing in^war.*in theFilterbox and pressing Enter. From the right-hand panel, select the normalised, realigned, and slice time corrected data -warsub-01_task-auditory.nii. -
Select
FWHMand change[8 8 8]to[6 6 6].How to select a smoothing kernel?
SPM’s default smoothing kernel is 8mm. While this may work well for larger cortical regions, it can make it difficult to detect signal from smaller regions. The smoothing kernel should thus be informed by the size of the regions you are interested in testing. Additionally, the size of the smoothing kernel should account for the voxel size of your functional data. The rule of thumb for choosing a smoothing kernel is to use approximately double the voxel size (e.g. if your voxel size is 3x3x3mm, your smoothing kernel will be 6mm).
-
Save this batch for future reference -
FileSave batchand name it, e.g.smoothing_batch.mat. - Run your batch by pressing .
SPM will now smooth your data by 6mm in each direction (i.e. x, y, z). The files will have the prefix s.
This completes the pre-processing of this dataset. The next two pages detail how you would link together all the steps performed so far into a pipeline using the batch editor, and how you would automate this process using scripting.